
Blog
Pinch-Valve Sleeve Wear: What to Inspect Before Replacement
24 September 2026
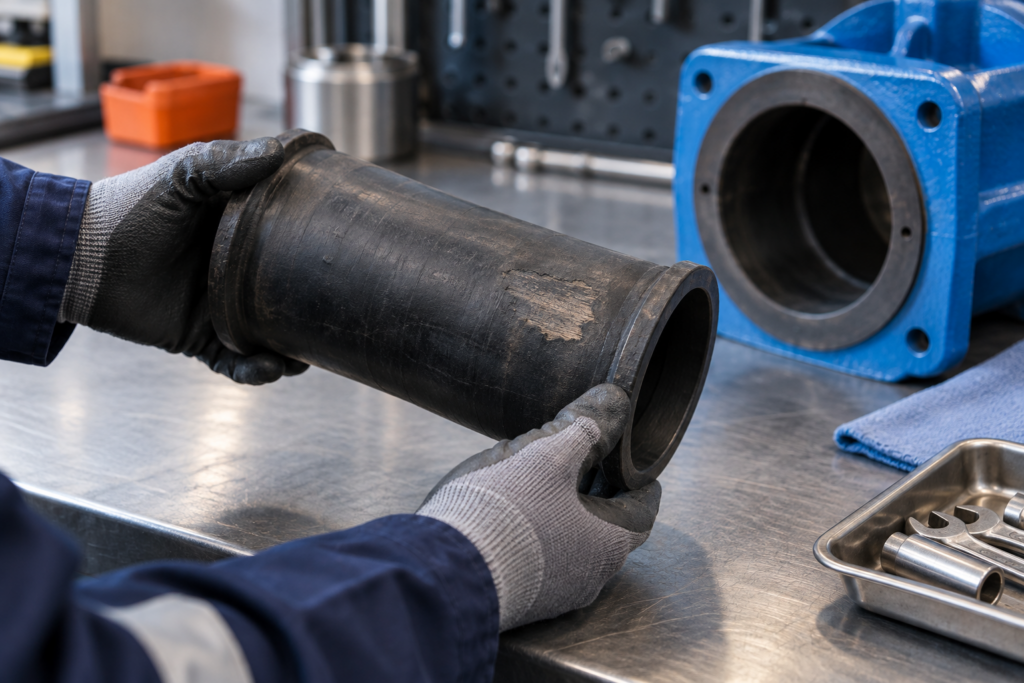
Sleeve wear is visible evidence, but it is not a diagnosis by itself. A worn patch, change in colour or damaged reinforcement tells you that action may be required; it does not, on its own, prove whether the cause was the medium, the operating cycle, the control pressure, the installation or a combination of factors.
This guide gives maintenance teams a practical way to record the condition, check the operating context and send a useful evidence pack before selecting a replacement sleeve.
Quick answer
Safely isolate and depressurise the plant, release and disconnect the valve’s control pressure, and follow the exact manufacturer’s maintenance instructions. Record the sleeve condition and where it appears, then collect the medium, pressure, temperature, switching frequency, control-pressure setting, installation arrangement and sleeve identity. Replace a sleeve when the manufacturer’s limit is reached; do not keep it in service while trying to infer a root cause from appearance alone.
Start with the safety boundary
Do not inspect or remove a pinch-valve sleeve on live equipment. The plant must be shut off and depressurised, the control-pressure line released and disconnected, and attached electrical equipment isolated where applicable. Use the process safety data sheet and site procedure to select appropriate precautions and PPE.
Those steps are based on current AKO operating instructions for its air-operated pinch valves. Other designs may have different isolation, dismantling and reassembly requirements, so the manual for the exact installed valve remains the controlling document.
What the visible condition can tell you
Use the sleeve’s condition as an inspection trigger, not a stand-alone failure analysis.
| Observation | Immediate action | What to record before disposal |
|---|---|---|
| General abrasion, scoring, cracks or another change from the previous inspection | Compare with the exact manufacturer’s wear criteria and remove from service if damage or the wear limit is reached. | Location, orientation, dimensions, photographs and hours or cycles since the previous inspection. |
| Black elastomer showing through a light-coloured product-contact layer | For AKO air-operated sleeves, the current manual says the sleeve must be replaced. | Valve and sleeve identity, medium, temperature, pressure and date first observed. |
| Fabric reinforcement visible | For AKO air-operated sleeves, the current manual says the sleeve is worn and must be replaced. | Clear photographs without cleaning away evidence, plus the operating history. |
| Leakage, damaged connections or a valve that does not close or open correctly | Isolate the equipment and follow the manufacturer’s fault and repair procedure. | Control-pressure reading, control-valve condition, connection checks and the exact symptom. |
The two specific colour and fabric indicators above come from one manufacturer’s current manual. Do not transfer them to another sleeve construction without checking that product’s documentation.
Six checks before you decide what caused the wear
1. Map where the wear appears
Photograph the sleeve before cleaning it, if the site procedure allows. Mark its installed orientation and the direction of flow. Record whether the change is localised or distributed and whether it is near an end connection, the closing zone or another repeatable position.
This preserves evidence for the valve manufacturer or supplier. It does not justify assigning a cause from the pattern alone.
2. Reconstruct the actual duty
Record the medium, concentration, solids content, particle size and shape where known, contaminants, minimum and maximum temperature, operating and design pressure, flow direction and any cleaning or flushing media. Add any change in feedstock or process conditions around the time the wear accelerated.
AKO states that sleeve life depends on several operating factors, including control pressure, sleeve quality, temperature, medium, nominal size and the duration and frequency of load changes. That is why a photograph without the duty history is incomplete evidence.
3. Check actuation and control pressure
Compare the actual control or closing pressure with the nameplate and the instructions for the exact valve. Record opening and closing behaviour rather than assuming the solenoid, tubing or exhaust path is correct.
For highly abrasive media, AKO advises keeping opening and closing times short and ensuring adequate compressed-air supply and exhaust capacity. Apply that advice only to a compatible air-operated design and have the arrangement checked against the installed model.
4. Check the installation around the valve
Record nearby elbows, reducers, unsupported pipework, vibration and any visible strain at the connections. The current AKO air-operated-valve manual warns against external forces and notes that insufficient straight distance after an elbow can create turbulence and premature sleeve or flange wear. Its stated clearances apply to the products covered by that manual; use the requirements for your own valve rather than copying a generic distance.
5. Identify the sleeve and its history
Capture the valve manufacturer, model, nominal size, sleeve material, batch or date marking and installation date. Record where and how a spare was stored. AKO’s current instructions call for dry, dust-free storage protected from UV radiation and explain that elastomer properties change with ageing.
Do not trim or adapt a sleeve intended for a different manufacturer’s valve. The sleeve is a pressure-containing, functional component and must match the valve construction.
6. Compare inspections over time
Set the inspection interval from the operating conditions and actuation frequency, then revise it using what the inspections show. A calendar interval copied from another duty can hide a fast-changing condition or create unnecessary work on a stable one.
The manufacturer, plant owner and competent maintenance team should agree the appropriate interval and replacement criteria for the installed equipment.
Evidence pack for a replacement enquiry
- Valve manufacturer, series, nominal size and connection.
- Sleeve material, markings, batch or date code and installation date.
- Photographs showing the whole sleeve, the affected area and its installed orientation.
- Medium, solids, particle information and cleaning media.
- Operating and design pressure, temperature and flow direction.
- Control-pressure setting, air-supply arrangement and observed opening or closing behaviour.
- Operating frequency, estimated cycles or hours, and whether the valve isolates or regulates.
- Nearby pipe fittings, supports, vibration and any recent process or maintenance change.
- The exact symptom, date first seen and previous inspection notes.
- Quantity, destination and required date for the replacement enquiry.
For a difficult or incomplete duty, use the Difficult-Media Duty Check. You can also review the existing guide to handling slurries and powders with pinch valves or browse the pinch-valve category.
Frequently asked questions
Can a photograph identify the root cause of sleeve wear?
Not reliably on its own. It can document the location and severity, but the duty, operating history, control settings, installation and exact sleeve construction are also needed.
When must a sleeve be replaced?
Use the wear limits and safety instructions for the exact valve and sleeve. For the AKO air-operated sleeves covered by its current manual, visible reinforcement fabric or black elastomer showing beneath a light-coloured product-contact layer are stated replacement indicators.
Should every pinch valve use the same inspection interval?
No. Manufacturer guidance ties inspection planning to operating conditions and actuation frequency. Use recorded inspection findings to adjust the maintenance plan.
Can a sleeve from another valve be trimmed to fit?
Do not do that. AKO explicitly states that its sleeves are designed for its valves and that external modification makes them unsuitable. Check the correct replacement against the valve identity.
Does abrasive service always explain premature wear?
No. Abrasion may be relevant, but control pressure, operating cycle, temperature, installation, medium compatibility and other factors can also matter. Preserve the evidence and check the full duty.
Talk to Valves4You about the duty
If you are replacing a worn pinch-valve sleeve, send the evidence pack rather than the photograph alone. Valves4You can use the Difficult-Media Duty Check to organise the application details before discussing a suitable route.